

Goat's Milk Soap -- I have looked at goat's milk soap before as a natural, gentle alternative to store bought chemical/toxin and fragrance filled soaps but I haven't ever thought to make my own.

And while I tend to stick with my DIY essential oil + castille soap foaming body wash when it comes to "soaps", after spotting some beautiful essential oil infused natural goat's milk soap balls in a lovely little shop recently for $9 a piece, I was keen to try my hand at making some. Plus, I could use my own essential oils which would mean we would experience the aromatic benefits of whatever oil combos I chose when we used the soap balls PLUS they would smell so good!!
- Uplifting -- spearmint, bergamot, green mandarin, lemon myrtle,
- Calming + soothing -- lavender, roman chamomile, sandalwood
- Skin nourishing -- cedarwood, frankincense, rose
- Sweet and floral -- geranium, patchouli, ylang ylang, clary sage, lavender
- Zesty fresh -- lime, tea tree, lemongrass, ginger, rosemary
I started doing some research (I do love a good research project!!) and decided I didn't want to mess around with making my own goat's milk soap from scratch so I chose to go with a melt and pour soap from Green Living Australia.
Talk about fast service!! I had my brainwave to make my own soap balls on Sunday night and I had ordered and received and MADE my soaps balls four days later!
I bought the Goats Milk Opaque Melt & Pour Soap base which boasts:
√ it is SLES and SLS free (Sodium laurel sulfate and sodium laureth sulfate -- two harmful, harsh chemicals to steer clear of as they are known to cause skin and eye irritation - here's a link to Safe Cosmetics Australia where you can read more about these two chemicals)
√ it is high in vitamins and minerals that are naturally in goat's milk

√ it has no petroleum based chemicals in the ingredients
Plus, it claimed to have a neutral odour which I liked as it meant whatever essential oils I chose wouldn't compete with the aroma in the goats milk (this wasn't quite right though.. more details below)
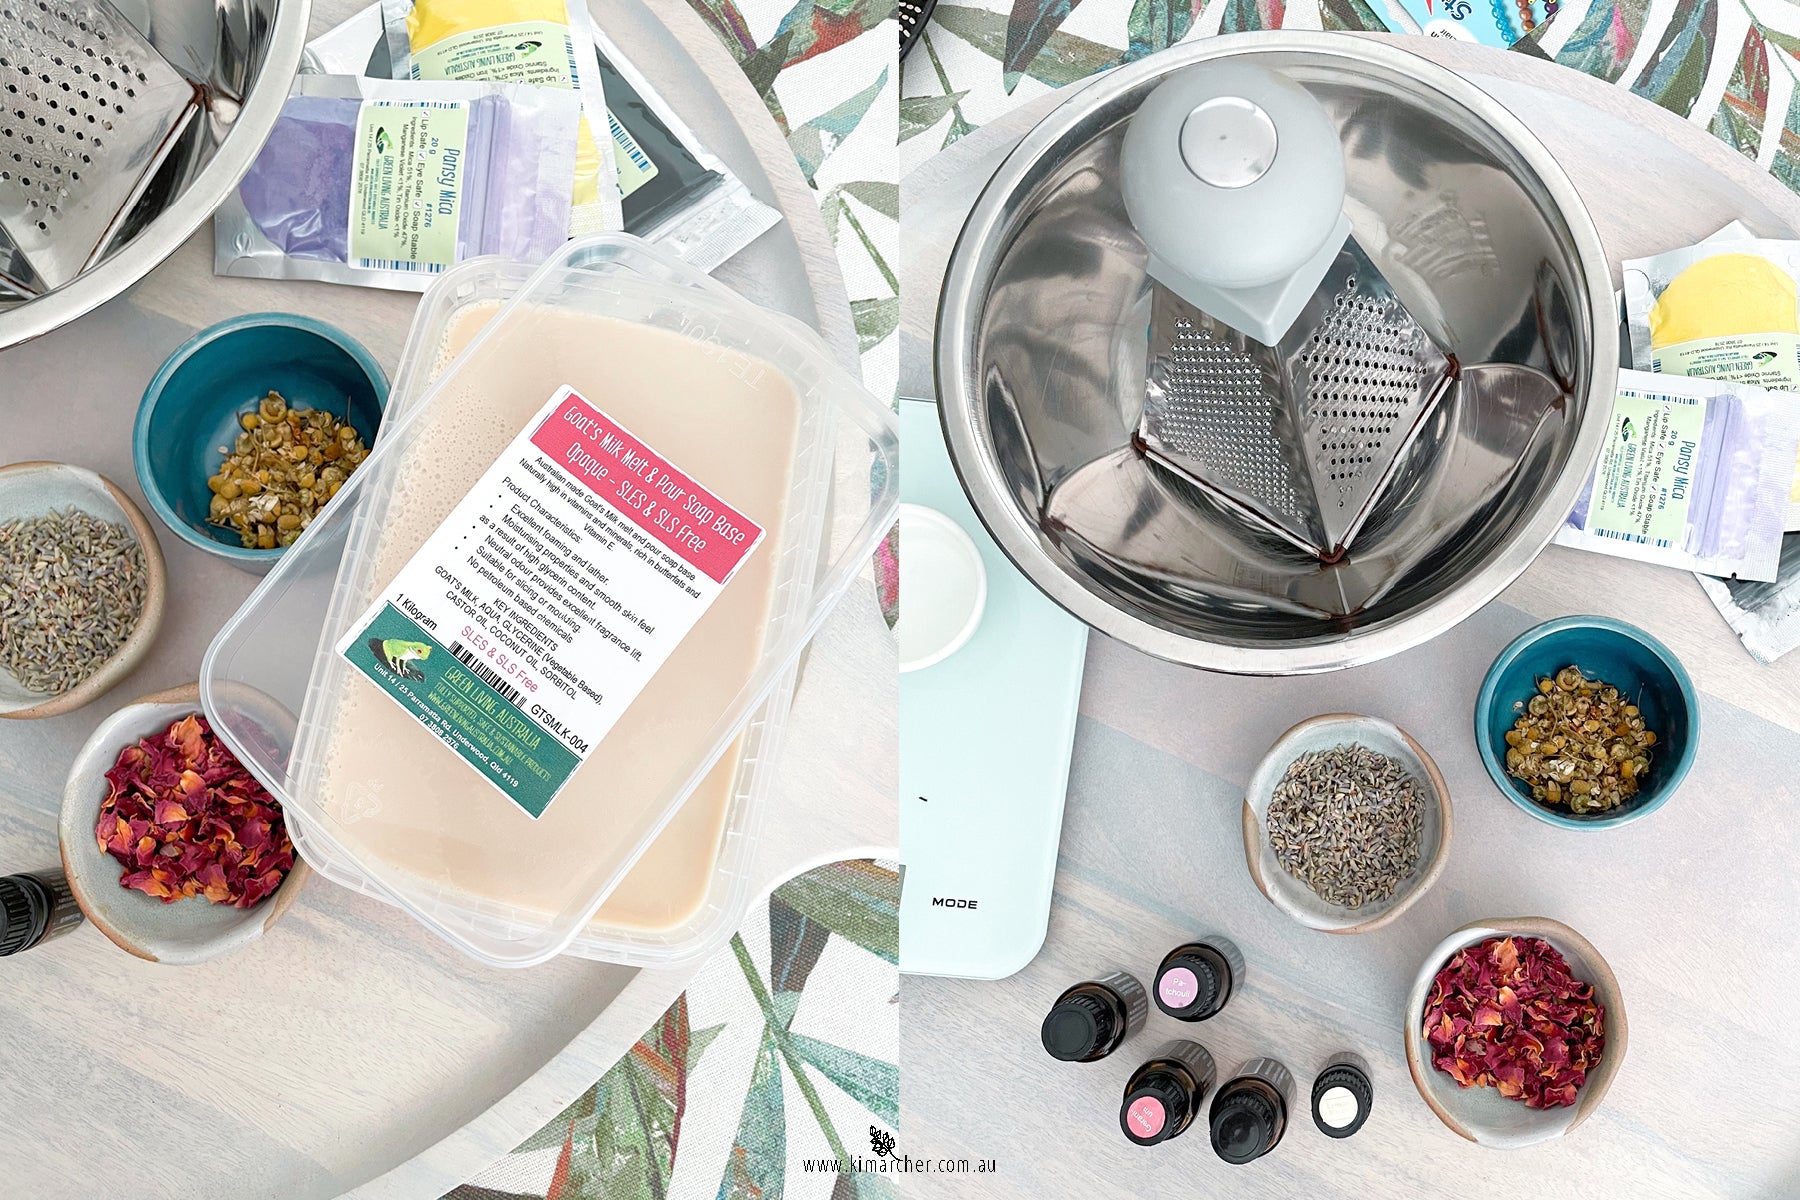
QUICK HOW-TO
Basically you will grate your soap into a bowl, sprinkle in any oils or botanicals and then mould the mixture into balls and leave to dry out until nice and firm and then it's time to lather up!
For those wanting a more in depth DIY and to read my tips and thoughts about this project, read on...
WHAT YOU NEED
- 1 kg melt & pour goat's milk soap base
- box grater, large mixing bowl and spatula
- glass Pyrex jug
- mica and botanicals for decorating/colouring (optional)
- essential oils
- some soap moulds
HOW TO
For those wanting to add some colour to your soap balls, Green Living had some great mica colours.. I bought the Pansy and Magic Yellow as well as some activated charcoal which I will use to make some charcoal coloured soap balls!

Start by cutting your soap base into chunks and melt in the microwave in a glass Pyrex jug for around a minute. Give the mixture a stir and microwave in 30 second increments until the soap has completely melted. (You can alternatively melt your soap in the glass jug in a saucepan of boiling water if you prefer).
This is where you will now add in your colour.
Add in about 1/4 of a teaspoon of mica. Don't be tempted to add more - I overdid it and ended up with a much darker purple than I wanted. Less is more. Stir until completely combined.

Pour into soap moulds. I have had this silicone soap mould for a while and I am not sure where I purchased it from. It makes six bars of soap. Set aside your moulds to set. I melted some additional plain soap base without any colouring for a more natural soap as well.

Once your soap has set, it's time to grate your soap so you can then mould it into balls. I used one bar of soap for each ball and I used the fine grater side of the box grater.
I'll be honest.. the grating part takes time and is sticky and messy BUT I think that is more to do with not letting the mixture set hard enough! I was too impatient. Plus our weather was hot so things were melting quickly!

Once grated, sprinkle in your chosen essential oils (about 5 drops) and massage them into the mix, squeezing and moulding the mixture together into a ball. If you find the mixture is too dry, dampen your hands and work that into the mix. You will feel the mix coming together and you can then also sprinkle in some botanicals before moulding it into the final ball shape.
I bought my botanicals from Centaur Packaging, again, some time ago. I used lavender seeds and rose petals. Other additives include poppy seeds and oats -- they make great, gentle exfoliant additions.

Mould your soap into balls -- you could use some scales to make sure each ball is the same size but I just winged it.. they are roughly the size of a golf ball. I didn't want them perfectly smooth and round so mine look a bit rustic which is the look I wanted.
Set aside to dry out and harden. 24 hours later and mine have still not dried out completely.. I have read they can take a week or so to fully harden and cure and then you are good to go!
Lather up and enjoy!
Notes and FYI
- I was able to get 14 golf ball sized soap balls from the 1kg block of melt & pour soap base.
- Unless I was adding mica colouring to the soaps, grating straight from the block of melt & pour base is easier then having to melt, pour and wait for the soap bars to set before grating them. I grated straight from the block for all of the soap balls except the purple ones.
- The soap base is not a neutral smelling soap as stated on the packaging. It has a vanilla, warm, milky sorta honey aroma. I couldn't quite put my finger on what the smell was. I liked it but it did compete with the aroma of the essential oils I chose.
- The scents I used were: Geranium + rose petals, Spearmint + poppy seeds and Lavender + lavender seeds. The Spearmint is definitely my favourite. one. And its the scent that is the least "milky" smelling.
- I only use doTERRA oils and as they are so potent and pure, you only need about 5 drops of essential oil per soap ball. I did however use more Spearmint.. maybe 10 drops and it turned out the strongest, best aroma.. so maybe experiment with your own essential oils and number of drops.
- I used the fine side of the box grater -- you want fairly fine shreds of soap as they mould up better. You don't want lumpy bits.
- You could store your soap balls in your wardrobe which would smell lovely while you are waiting for them to cure/harden.
- I have since used the Thermomix to make the second batch AND made some amazing charcoal spearmint and lime soap balls but that will have to be PART 2 of my soap ball adventure! Stay tuned!
